Tuesday, February 15, 2011

Sunshine for Valentine's :)

Photobucket
"After Chinese New Year comes a whole lot of dying oranges..." (Ong,2011)

I spent Valentine's Day evening with my family, having our early Last-Day-of-Chinese-New-Year dinner, watching So You Think You Can Dance on TV, and...peeling oranges. It all started with my determination not to let our mandarin oranges go to waste this year. We're usually left with so many after visiting our relatives that we have them for dessert every single day...for two weeks. And well, some of the poor defenseless oranges don't even last two weeks. The stress of being passed from hand to hand, house to house does take its toll, and I'm sure everyone can identify with lots of orange wastage each year. Last year, I smoked a duck and stuffed some oranges up the poor creature's butt to keep it moist. This year, I decided to be kind to animals and make jam instead.

My colleagues were kind enough to let me acquire the dying oranges off their desks, so I spent a good 3 hours peeling them (with my OCD-ness, I wanted to peel every last bit of white fibrous pith off), splitting every slice open to extract the seeds, cutting bits of peel and then blending and boiling the whole lot down. At 11.30pm, I ended up with this:


Photobucket
I love the sunshiney-orange colour :)

Photobucket
This was taken a few days after the jam had cooled and set. Better lighting (and at 11.30pm, I was way too tired to take proper pictures anyhow)

Photobucket
One of my sister's rats decided to come sniff out the jam...

Photobucket
Spread some of the sunny orange stuff on plain crackers or toast :)

*Note: Because mandarin oranges tend to be rather sweet, I added some lemon juice to perk up the flavour, and cut some of the sugar in the original recipe.bvg

Thursday, February 3, 2011

Happy (Y)Ear of the Rabbit! :)

Photobucket

I know everyone will think their own mothers or grandmothers make the best pineapple tarts, but I really have to say that my mum makes the best pineapple tarts :) Think soft, crumbly, melt-in-your-mouth pastry wrapped around tart, chewy pineapple jam. I definitely prefer the covered version of this traditional favourite to the open-faced ones (and they're easier to make too :p). Our recipe originally came from my grandmother, who picked it up from a cooking class, then made her own modifications, and then my mum made her own modifications...so it's a sort-of family recipe.

My contribution to the annual CNY baking is usually in the design. We thought it'd be cute to make the tarts in the shape of whatever Chinese zodiac animal which was represented. So we've done rats, cows, skipped the tigers last year because that was too hard...and this year I'm proud to present my pineapple bunnies :)

Photobucket
With rainbow-coloured noses! :)


Photobucket
Of course I think the pink-nosed ones look the best ;p

Photobucket
The ears are sliced almonds, and the nose is a heart-shaped sprinkle. The face and mouth...well you're on your own for that :p I used a toothpick to carve those out...

Photobucket
The bunnies got a little fatter after baking...

Photobucket
My other contribution: peanut cookies (the recipe and step-by-step are in the previous post). Decided to try hearts and flowers this year :)

Photobucket

Have a hoppy, nutty new year! :)

Monday, January 24, 2011

Chinese New Year Peanut Cookies

Photobucket

Besides pineapple tarts, this is another one of my must-haves during Chinese New Year. I first tried out this recipe last year, and they were so good that my mother declared that we shall never go back to store-bought peanut cookies. :) Which means that I think I have to make these every year from now on :p There's just something about freshly-made, really peanutty and preservative-free cookies that make all the difference :) Here's the recipe and step-by-step guide...

Ingredients:
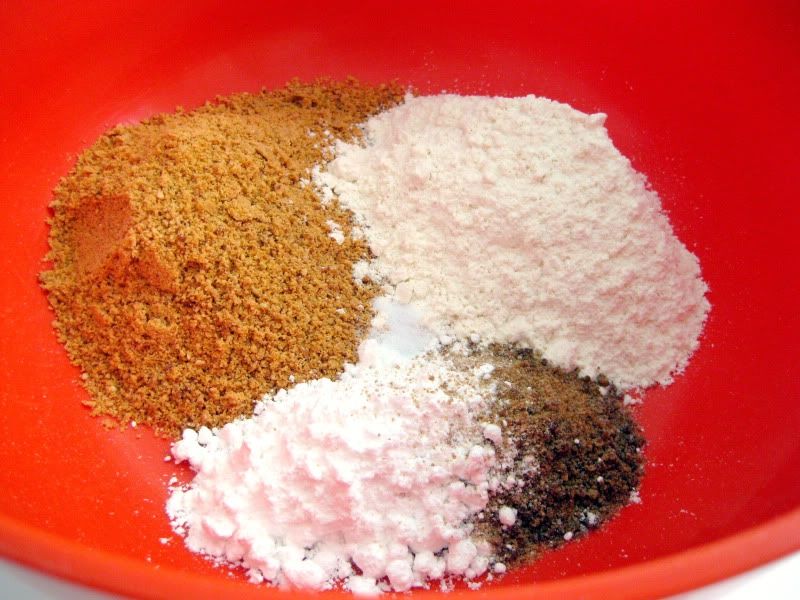
  • 200g finely ground peanuts
  • 200g plain flour
  • 100g icing sugar (or, if you like, use 75g icing sugar and 25g brown sugar for greater depth of flavour)
  • 1/2 tsp baking powder
  • 1/4 tsp salt
  • 2 tbsp butter, softened
  • 100g cooking oil
  • 1 egg, beaten (for glaze)

Photobucket
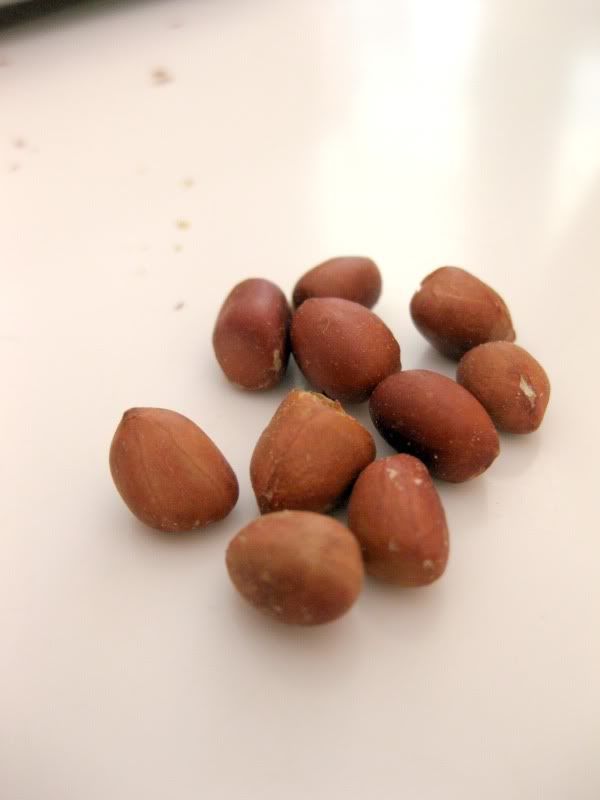
Ground peanuts are readily available in most supermarkets, but I prefer to roast my own as I can control the amount of oil and salt that go into the nuts. In this case, I didn't use any oil and salt when roasting. Just put the raw peanuts on a baking tray, and bake at 200degC for 12-15 minutes.Check on the nuts after 10 minutes, as they do burn easily.

Photobucket
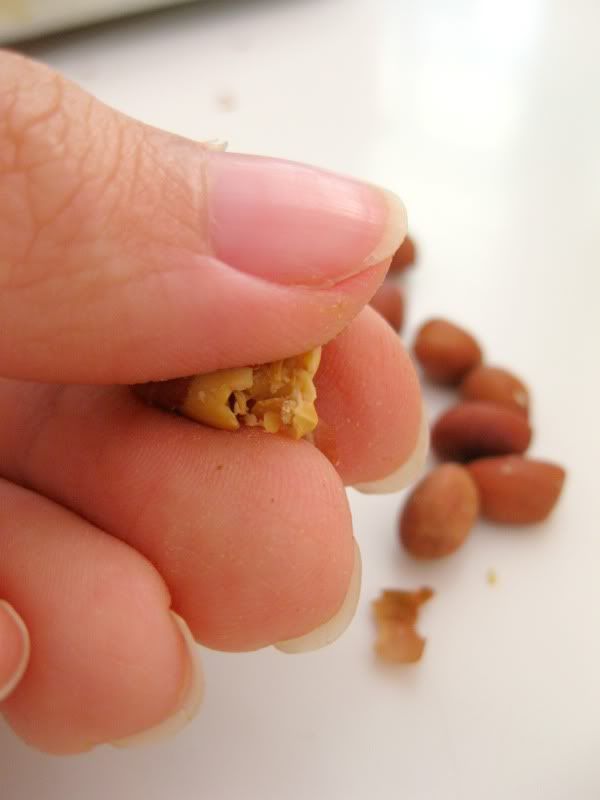
After the nuts cool for a few minutes (please don't forget this step, your fingers will thank you...), rub each nut between your fingers, and the papery skin will come off easily.

Photobucket
It's a bit time-consuming but also fun to do. Sort of like snapping the roots off beansprouts :p

Photobucket
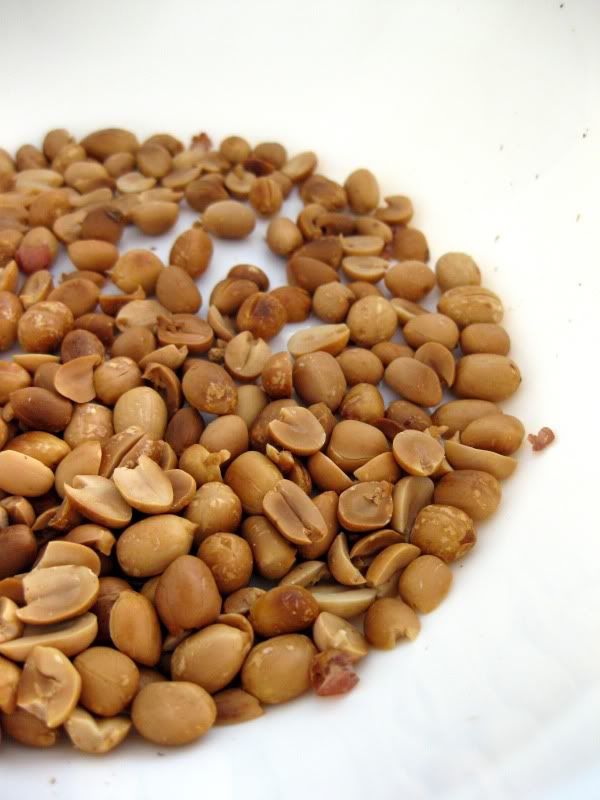
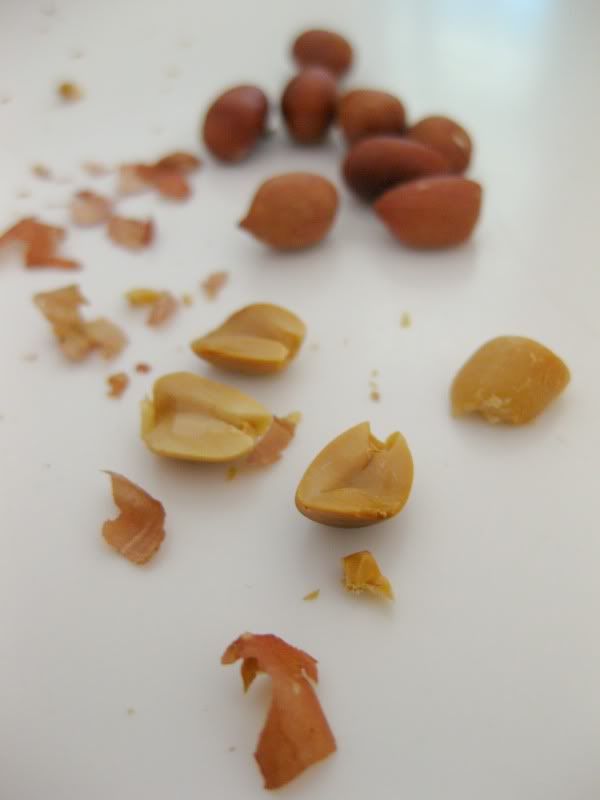
And before long you have your own beautifully-roasted peanuts :) If you look really closely you'll see that I burned these a little...went to eat lunch and forgot to check on them.

Photobucket
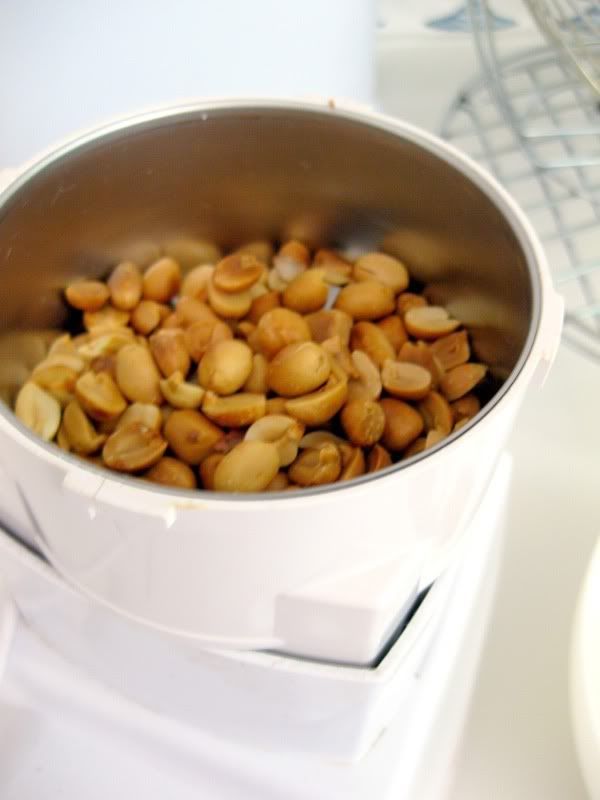
To make your life easier, use the chopper attachment of your blender to grind the nuts. If you don't have one, a mortar and pestle work fine too. Just that you'll have really strong arms at the end of it...

Photobucket
And there you have it...ground peanuts!

Photobucket
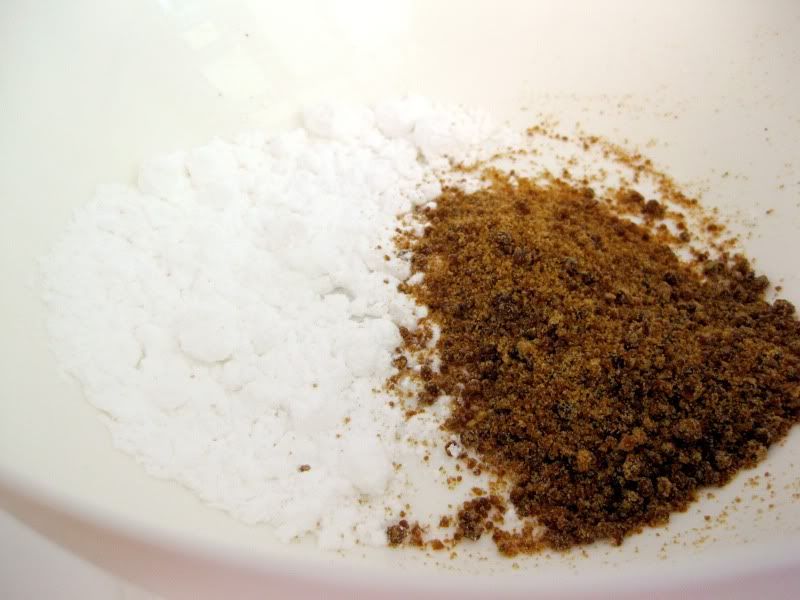
Icing sugar gives the cookies their fine, melt-in-the-mouth texture. But I like to add a bit of brown sugar (unrefined, if you can get it) for the deeper flavour. This time, I used black sugar (sometimes found in the dried herbs section of the supermarket).

Photobucket
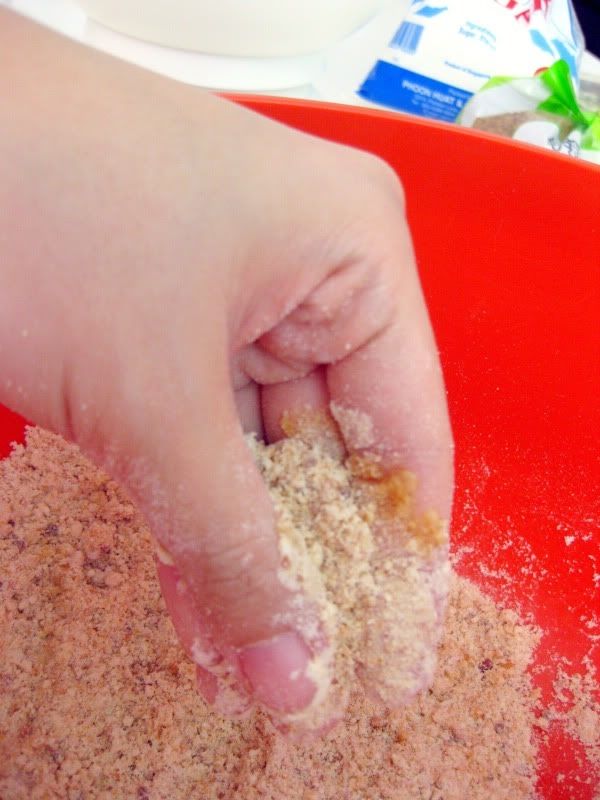
Put the ground peanuts, flour, sugar and salt into a nice big mixing bowl. And from now on, you're gonna do everything with your hands :D

Photobucket
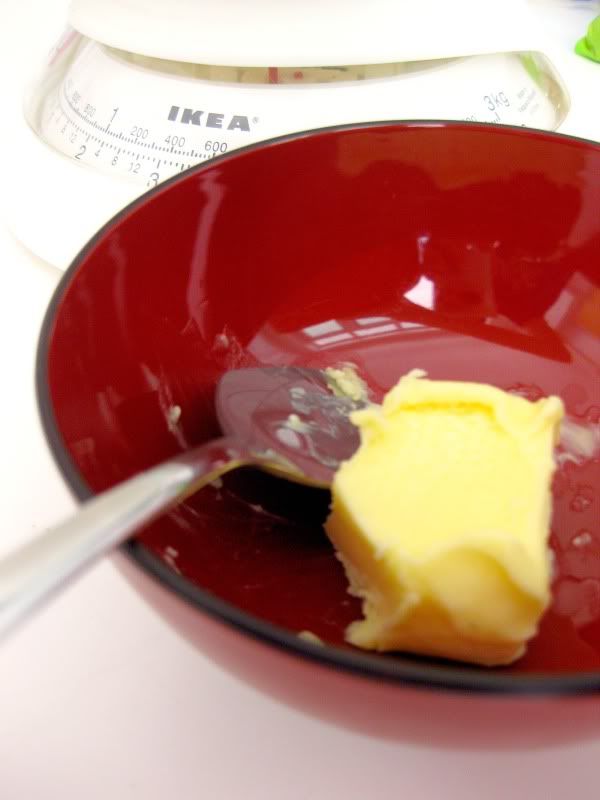
Add the 2 tablespoons of butter to the dry ingredients...

Photobucket
And rub it in. If you've made shortcrust pastry before, this is the same idea. If you haven't, well just rub the butter with the flour-peanut mixture until all the butter disappears.

Photobucket
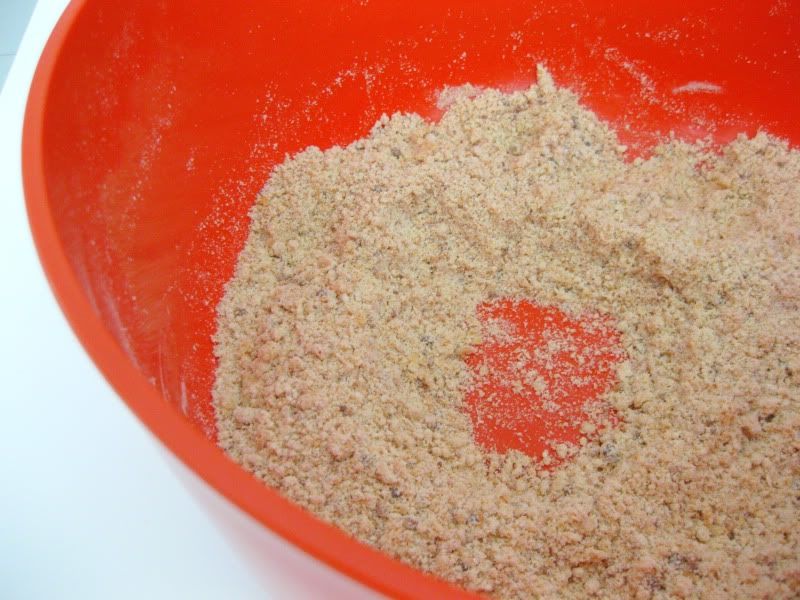
Next, make a hole or well in the middle of the bowl, like this...

Photobucket
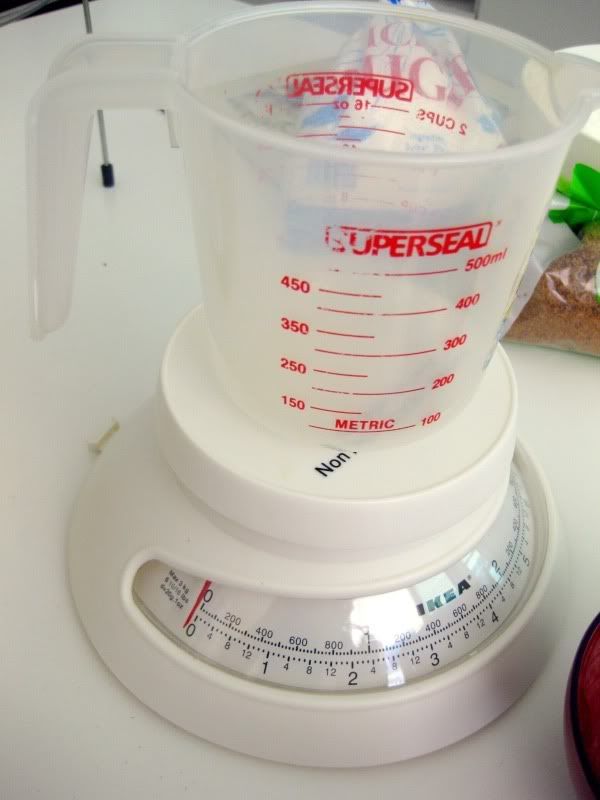
And measure out your cooking oil. To get 100g of oil, simply put your measuring cup or any container, really...on the weighing scale. Tare the scale back to zero, then pour in the oil until the dial hits 100g.

Photobucket
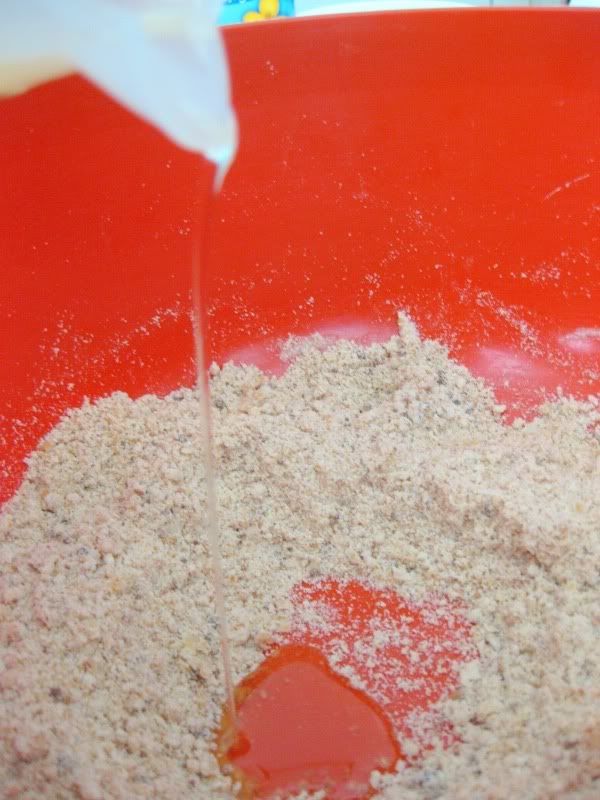
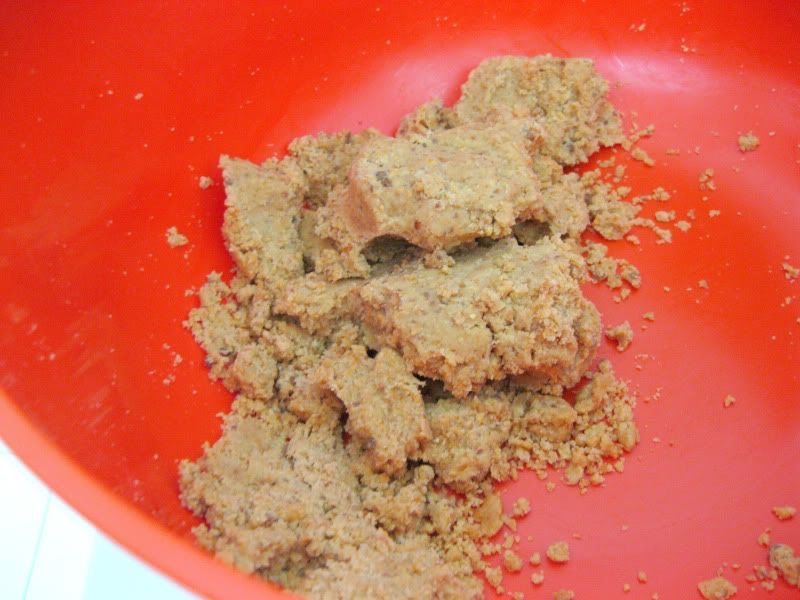
Pour the oil into the flour-peanut mixture in parts, mixing well with your hands after each addition. You may not use all the oil. When a dough is formed (i.e. everything sticks together), that's enough oil.

Photobucket
So this means: add more oil!

Photobucket
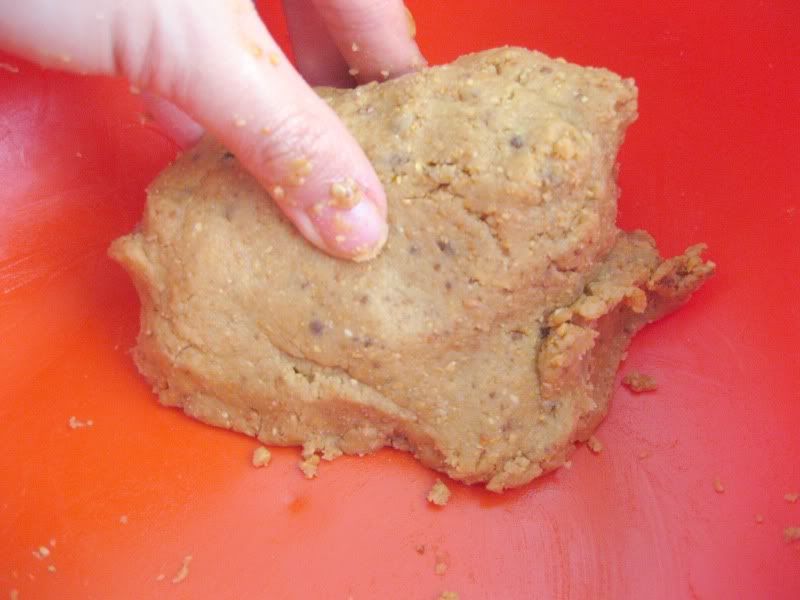
And this means: you can stop now! To make the dough more pliable and easy to work with, knead it a bit more as the heat from your hands will help meld all the oils in the dough.

Photobucket
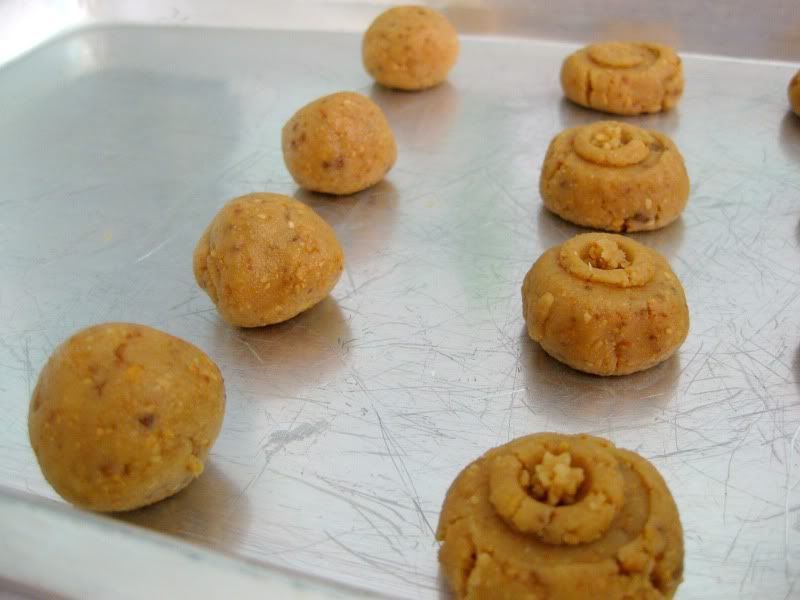
Roll the dough into small balls. Incidentally, that's another way to check if you've added enough oil. If the dough falls apart when you're rolling it into balls, add more oil!

Photobucket
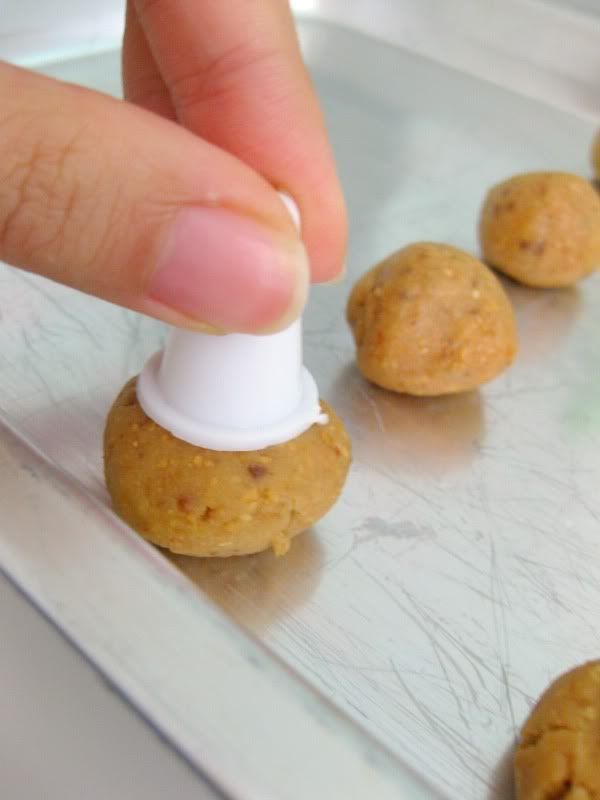
Flatten the balls of dough slightly (and decorate them) with whatever you have on hand. A fork, bottle cap, they all work and produce different patterns. Here I used both ends of a piping bag tip.

Photobucket
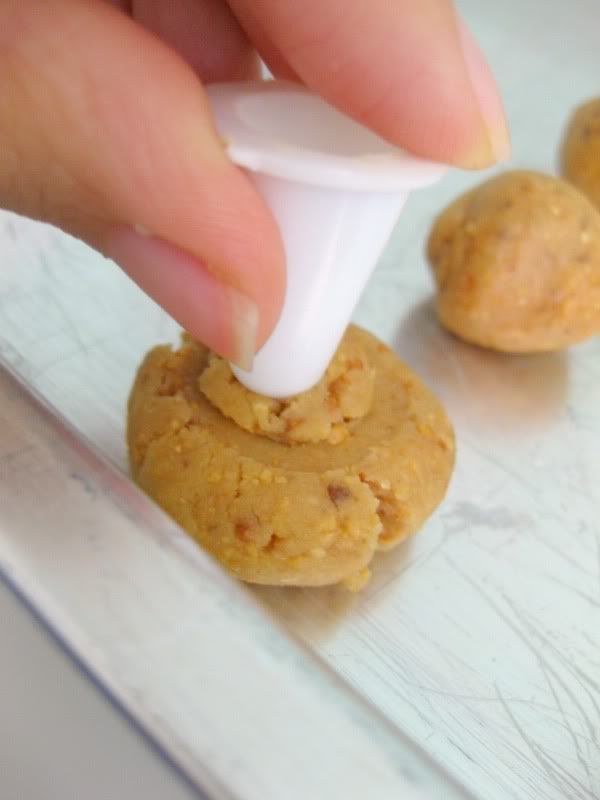
And this is how you can get two different patterns from one little tool :)

Photobucket
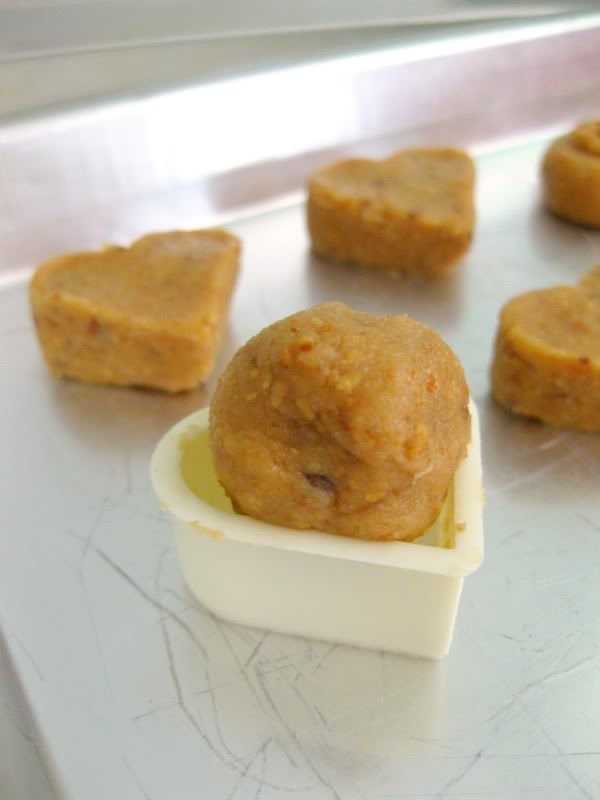
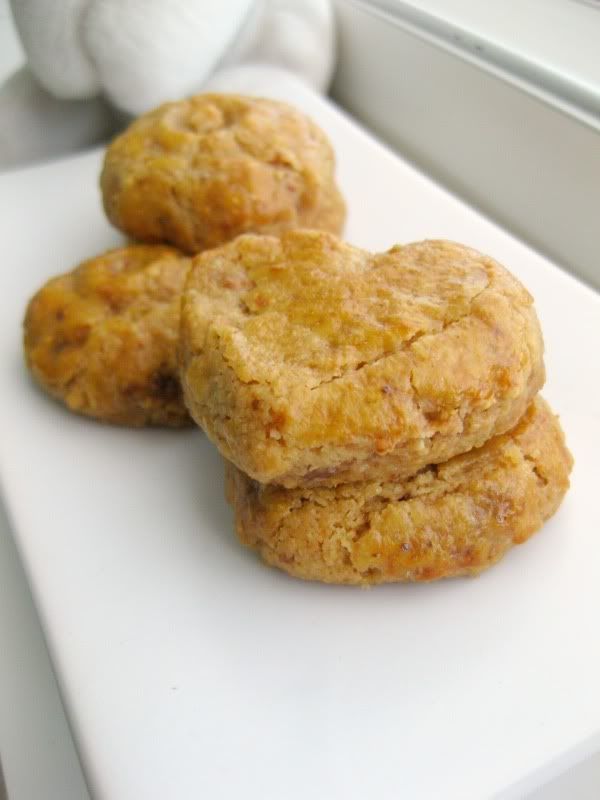
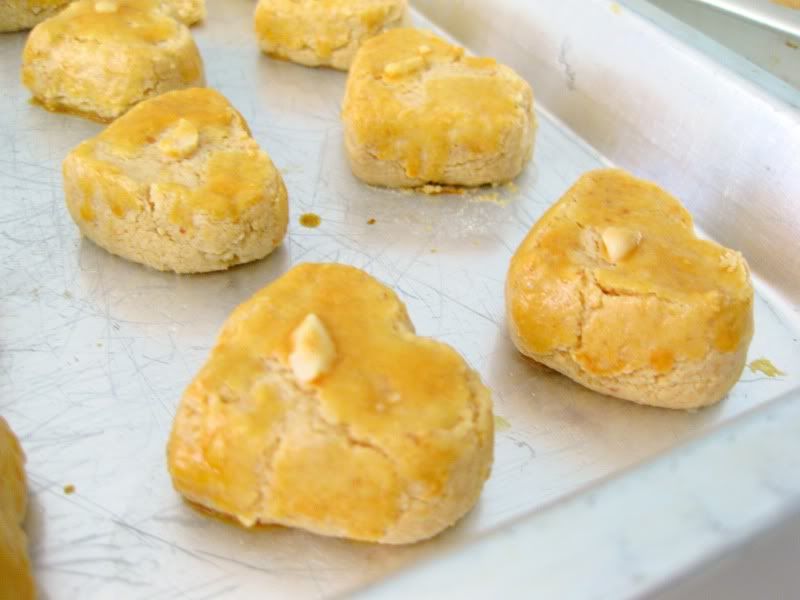
But since Valentine's Day is during CNY as well, why not do heart-shaped cookies? Push a ball of dough into a cookie-cutter...

Photobucket
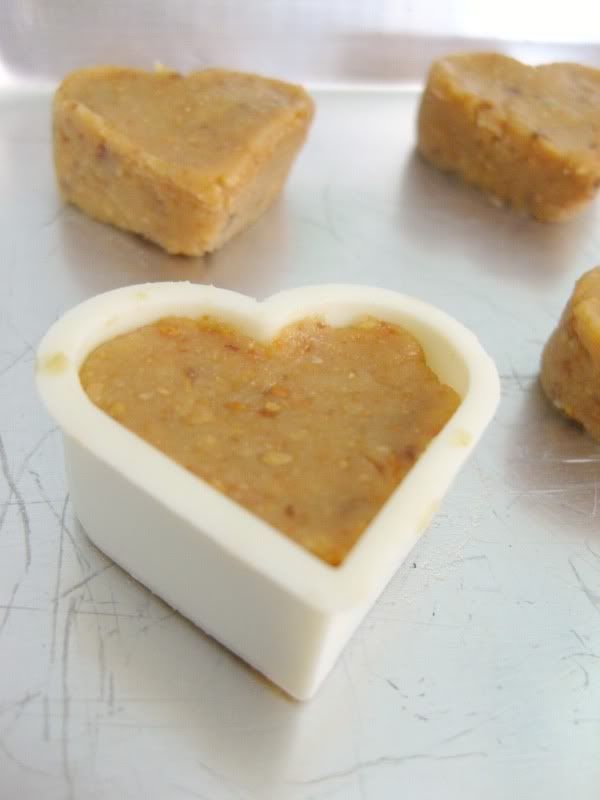
It should look something like this. Then gently push the heart out...
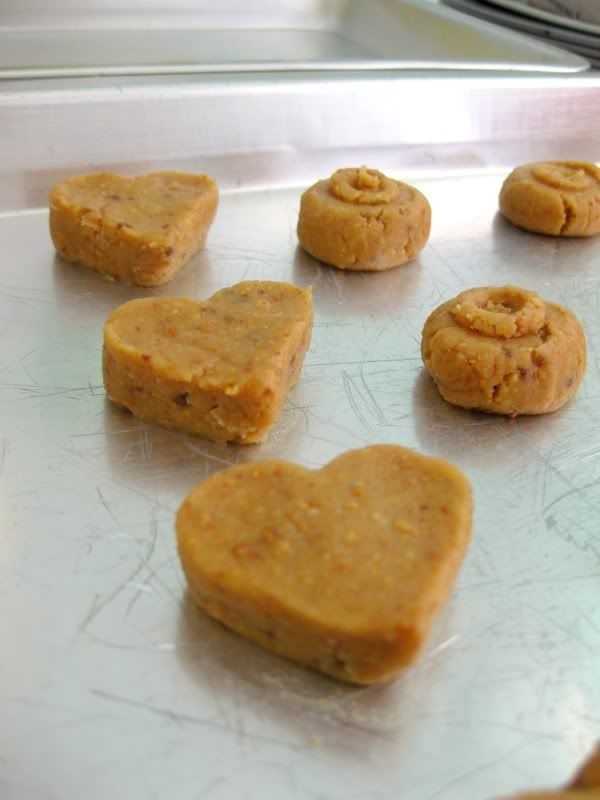
Photobucket
Ta-dah!

Photobucket
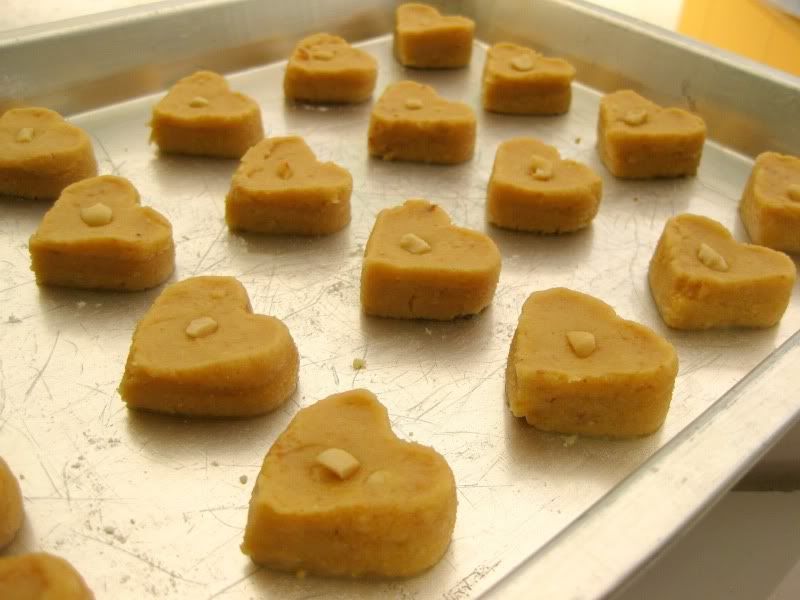
Here are some I did last year. I put a little peanut piece in the centre of each cookie for decorative purposes...

Photobucket
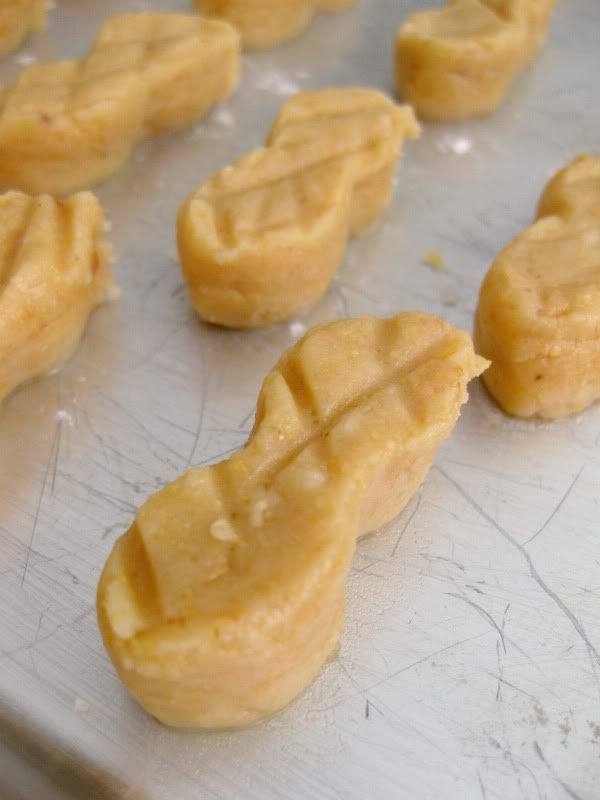
And for some reason...I had a peanut-shaped cookie cutter lying around. So I did peanut-shaped peanut cookies!

Photobucket
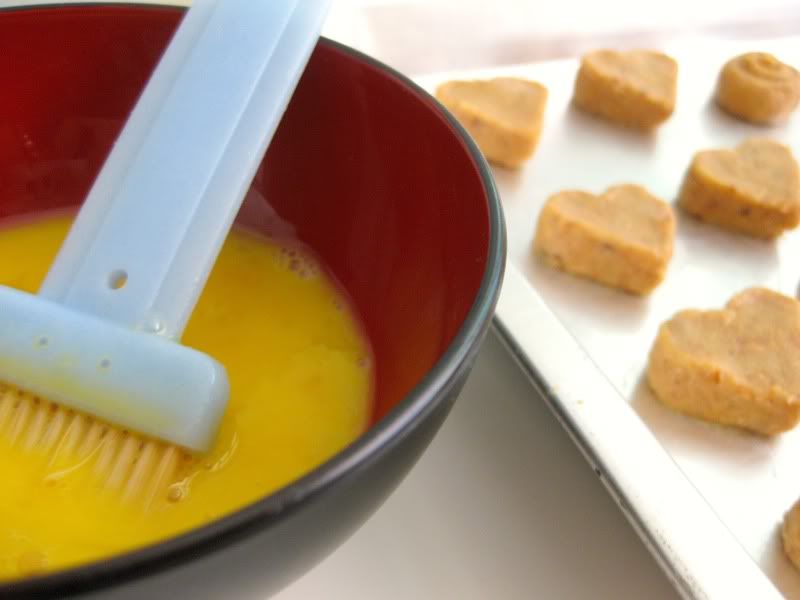
At this point, preheat your oven to 165degC. Brush a thin layer of egg onto each cookie. This gives it a nice golden colour and shine. There's no need to oil/grease the trays as peanuts have a lot of natural oils so the cookies won't stick :)

Photobucket
Bake for 15-20 minutes. Again, check on the cookies halfway so that they don't burn. Leave the cookies on the trays for about 5-10 minutes after baking. This allows them to set and firm up (if you try to move them before this you'll get crumbly peanut powder...)

Photobucket
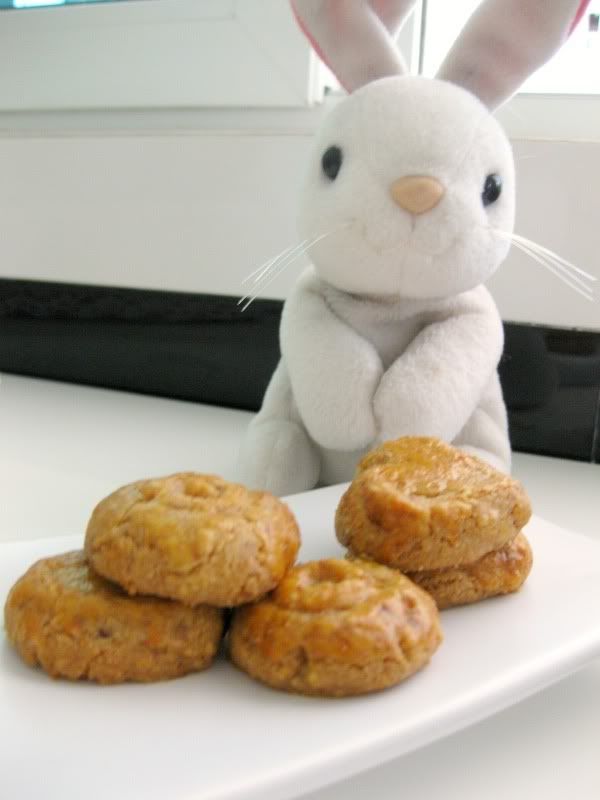
Have a happy and blessed year of the rabbit! :)

Wednesday, January 5, 2011

Pink, Fluffy Beginnings :)

This is what inspired me to start food-blogging again: A perfect batch of pink marshmallows!

Photobucket

I've always wanted to make marshmallows. Not just because I absolutely love the puffy, fluffy sweet stuff (and hey, it's 99% fat-free ;p), but marshmallows belong to the category of "Wow! You made that?!" foods. Most people (and for many years, me included) have only seen (and eaten) the white, tubular ones that come in a bag from the supermarket, and they always make a special appearance at BBQs. Who can resist the crisp exterior? The warm gooey insides? The fun of toasting them on satay sticks and trying not to burn them too much? (Oh by the way, marshmallows are great with Lay's Sour Cream and Onion Chips too. But then again I'm weird that way :p)

And then one day, I saw homemade marshmallows on a food blog. And it was like there was sunshine and rainbows all around. They were huge, fluffy and looked like they weighed nothing at all. And they could be made with all kinds of wonderful flavours like peppermint, coffee, mango...But at that time I thought that making them would only result in a sticky mess, given our hideously humid climate. And then one day, my sister mentioned that she had a digital food thermometer, which is key in candy-making. Thus began my adventures into the world of marshmallow magic. It wasn't as hard as I thought! The mystery of marshmallows (did they fall from the sky?) was solved. Some gelatine, water, sugar, egg white and lots of air, and you get the lightest, prettiest marshmallows ever. I can never go back to the commercial stuff again...

Photobucket
This is actually my second batch. After whipping all that sugar and egg white, you get a whole tray of puffy stuff.

Photobucket
Which you can cut into squares (or any shape you want!)

Photobucket
But since the marshmallows will still be sticky...

Photobucket
They need to be tossed in cornstarch and icing sugar. In this case, I used snow powder instead because it doesn't melt in our sweltering heat

Photobucket
Now pop one in your mouth and enjoy! :) They're also really good with warm melted chocolate.